Work in progress, but since it is a long project and I am running out of April for posting, putting it up here now. The inspiration is the two doll quilts Mrs. Trentacosta made for us as kids. My nieces each have a special "friend" who could use a blanket. The squares are straight forward, with the "characters" on the certain squares being cut out of iron-on repair patches. The edges are in progress..binding tape, hand stitched. Mrs. Trentacosta was a far superior hand sewer than I...."patience" being attributed as a virtue surely had something to do with handwork. Gad.
Wednesday, April 23, 2014
Saturday, April 19, 2014
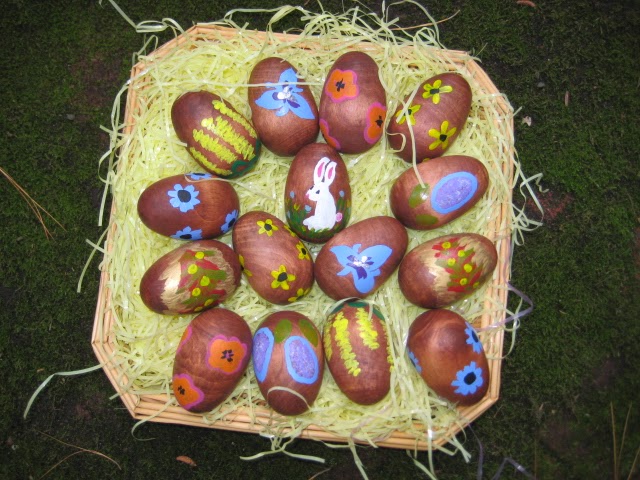
Wooden Easter Eggs
The thought was that they would be hidden to help defray the "hassle" (did I say that?!) of doing real eggs each year, but it didn't quite work out that way. Wooden eggs -- sanded, wood stained, and painted.
Here below "bindi bunny" ...the cherries moved around quite a bit when the green stuff was poured in the mold. Tried to get them back to the right place, but the green "swamp" made it difficult. Once it set, the cherries were as they settled. Oh, and a joke, perhaps in questionable humor....she also has a hare lip.
Here below "bindi bunny" ...the cherries moved around quite a bit when the green stuff was poured in the mold. Tried to get them back to the right place, but the green "swamp" made it difficult. Once it set, the cherries were as they settled. Oh, and a joke, perhaps in questionable humor....she also has a hare lip.
Friday, April 18, 2014
Easter Bonnets
Straw Hats, artificial flowers, and glue gun. Result: 2 Easter Bonnets for two little girls, and an important lesson (the hard way) on how hot glue commands respect in regard to my finger tips. Use protection! I knew there was a reason I so rarely use hot glue...not only because it is a fake way of making something, but also...the pain, the pain (Dr. Smith to Will Robinson). (Burn treatment: Cold water soak for 10 minutes, vinegar dab for pain).
Saturday, April 12, 2014
Skirt..15 minutes
Cotton makes for fast through the machine and stable cutting.
a. Fold fabric in half, right sides together.
b. 3/4 inch from top, cut, arching up on gentle slope to desired waist/hip (or where you want to wear it) width...give yourself seam allowance.
c. Cut down open side (not the folded side!) to the desired length. Shape your side cut as desired...for slight A or for straight.
d. Cut another piece for back.
e. Sew sides. Press seams open.
f. Turn over waist band and sew. (you can do covered elastic or drawstring..I prefer clean and custom fit).
g. Hem
Subscribe to:
Comments (Atom)


